Updates in current project. Transferring to Unity3D. Framework renewal.

Well, it has been some time since the last post here (looks like it has been about a year). So maybe it’s time to make another one, huh? Especially due to some changes in current project. Especially due to amount of such changes.

First of all – the whole project has been transferred to new game engine, «Unity3D». Well, it was a tedious task, which took few months, of course not counted in 9-to-5 days, but it took some time. You may think it’s easy to transfer resources – just copy 3D models, textures, etc into a different folder. Maybe then you’ll even have to place them in some scene and somehow link them together in the editor, but it’s not that hard. Yes, sure, but my project used to have quite a huge amount of resources. However, I managed to perform this task in a couple of days. The most challenging task was to transfer the code. I mean the code. Porting the code in such cases intends a huge amount of work: from updating all calls and all usages of all internal and built-in functions and components to a complete rework of everything. Which path did I choose? I think a middle one. I had some ideas which I wanted to implement, but old version of project’s framework just wasn’t capable of carrying this changes out. Anyway, I had to transfer all the code to C#. So it was a kind of an opportunity to make a clean start, but keeping in mind some well-proven methods. The center idea was to specify the purpose of those blocks called «Mechanism». For example, I decided to make them less universal – to remove all things related to arbitrary data input-output. Also I decided to clarify their cooperation model – to make them explicitly independent or linked together. Describing all innovations here is pointless, but to mention, new project’s framework is now more narrowly-focused, making more use of state machine logic.

Next, it took some time to link it all together. I’ve just imported all the stuff into folders, made a project, a scene, then just placed some stuff in that scene. Well, it wasn’t that hard, I would say it was some kind of fun, but…

Easy as WYSIWYG

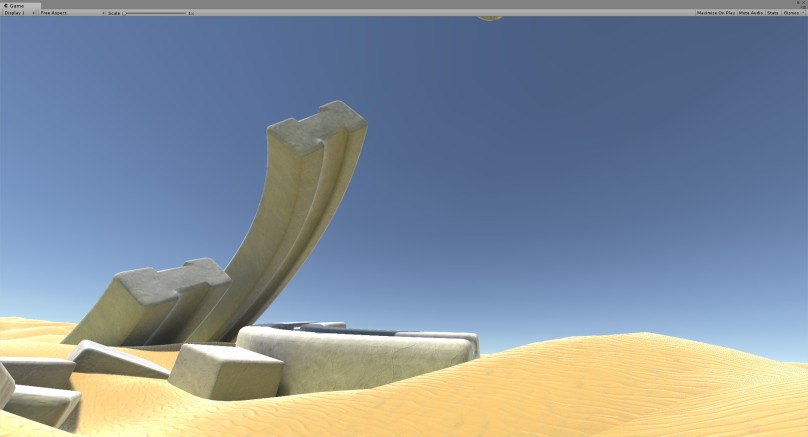
But the sad part is that Unity3D is as simple as a pie, but it still doesn’t have some essential built-in things, like material editor (I know there is one at this time, but, damn it’s a piece of crap) or in-game logic editor (like Kismet in UE3). However, there are some solutions available at it’s own store, but some of them are complicated as hell and some of them are piece of crap too. So, setting things together caused a some amount of hemorrhoids. However, making use of my old resources (hi-res meshes and textures) made the scene look quite nice. And with addition of couple of shaders from the store it turned into a somewhat nice scene (virtually as nice as it looked back in UE).

The next task was setting up all game logic. Well, there’s not much from original game logic in the project at the moment, but at least we can test the new character system from my ‘new’ framework. Setting up complex things like characters in Unity3D is somewhat an interesting task: Unity has built-in component system, which allows you to build everything from scratch just by adding right components to your blank object (as far as I know, it’s called component object model). Currently, there are dozens of them in Unity: rendering components (they make stuff appear on the screen), physics and movement components (they make stuff move all around), some utilities and, finally, custom components. So, adding mesh to your object (or character) is easy – you just have to add a MeshRenderer and MeshFilter components. But making any other stuff like movement or interaction causes some haemorrhoid: you have to write your own scripts, which are attached as components to your object. Lucky me, ’cause I know how to handle scripts and all the ‘code’ stuff, poor you if you don’t.

So, the character is processed by a custom component which holds all available actions, such as moving, jumping and all other characters’ stuff. Those actions are not components, neither they are added directly to the playable object, they are independent pre-set resources which are processed by the master component (which is added to the object).  Just for test purposes I’ve added only movement mechanics to the character (previously imported xenowalker character). Well, it worked – we can move around with our character: we can run, jump and fall with appropriate animations being played.

Oh, sure that wasn’t that simple as drag-and-drop stuff. As I said earlier, I spent several months debugging this system to make it work. Crap, crap, crap, it wasn’t easy’n’simple at all! Only then I could use this custom component. But for now I think the framework has reached some ‘point of stability’ which means I’ve done with all the basic stuff (basic action performance, transition between action, etc) and I can now focus on producing more complex real game logic.

Also, unity editor is quite permissive in things you can do in it’s edit mode or in it’s play-in-editor mode. For example, you are free to playa around with any values in your object’s components’ fields. Or, if you already have some working game logic, you can test it any way you want it. Yea, I found it quite fun to play with.

Play around with all things in real time? Easy as a pie. Literally – P-I-E (play in editor)

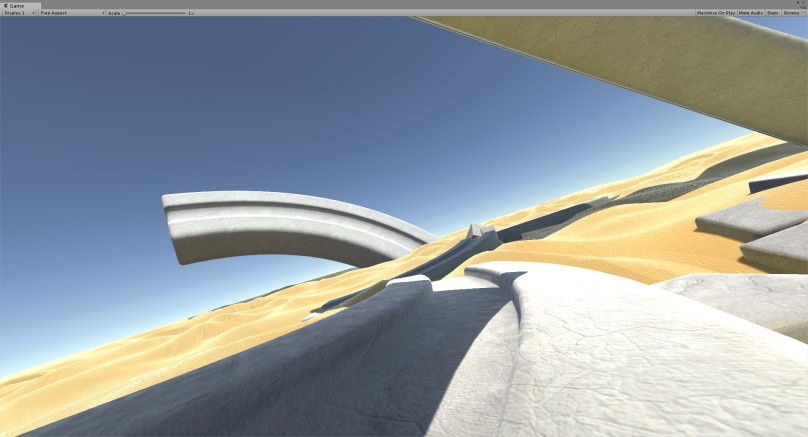
And, finally, a couple of word about graphics. As we can see, everything is looking not that bad – there are baked shadows, indirect lighting, reflections, even subsurface-scattered materials in the scene. However, not all of this stuff is essentially provided by Unity.

For example, I used legacy 3d models and textures (contents of the project), also I took skin shader from the store (it’s free, however), and, of course, I used my own game logics (the framework). For example, if I would start everything from scratch (with only basic knowledge in game development), it would be a total hemorrhoids: I would have to plan and build my framework in terms of component object model (it’s not very close to object-oriented model we normally use), I would have to make my own scripts for all basic stuff (movement, interaction, player controls, etc), I would even have to write my own shader programms (oh, it’s a lot of pain). It’s not that simple, I guess. Or I just could use some ready-to-go solutions (tonns of them in the store). Honestly, I tried to use some frameworks like ‘racing game kit’ or ‘3rd person basic framework’. What can I say? They’re not working! At least those so-called frameworks or kits. Okay, maybe they are not working as I want them to work: they are not flexible at all, they are not universal, they have strange structure (often illogical), they are hard to study after all (so few documentation). For example, one of those ‘fast character kits’ asks your characters to have specific bone hierarchy, and another asks your characters to have a special foot placement. What? Well, that’s ridiculous, at least, in my case. However, there are some ready-to-use 3d models, textures and animations (even complete characters)  in the store which often comply with these demands. But really, why it’s so hard to put all this things together and make them work?! Maybe just because all this things were made by different people in different time with different ideas in their heads.

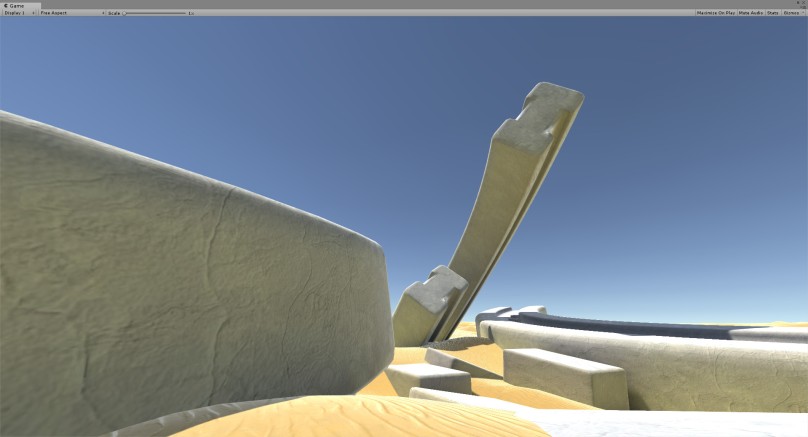
So, finally, the only thing I’ve imported from the store is that cool subsurface-scattered shader – I used it on the character. I really enjoy it, just look at that shadows and that glowiness, it really looks like world-space subsurface scattering.

To conclude, here is my personal opinion about Unity3D.

Warning, butthurt alert!

Good sides are:

  • Unity itself is small and compact, runs even on a calculator;
  • It allows to make logically-structured projects, makes good use of folders;
  • It has a liberal debugging scheme: debug every aspect, debug scene, debug code, debug in real time, debug in IDE, debug in an old-school-style with all that logs;
  • It is based on .Net Framework with all its powers and dark magic;

Bad sides are:

  • No matter what you say, it’s hard as hell to start from scratch;
  • Unity is full of bicycles, literally – f-u-l-l o-f b-i-c-y-c-l-e-s;
  • There are some ready-to-use bicycles, but you can’t always use them (at least all together);
  • Good graphics level is hard to achieve, it goes too flexible here;
  • Horrible situation with some WYSIWYG-must-haves like material editor
  • Updating every damn second (some of my code parts have already outdated);
  • I’m still searching for a good code explorer (like UnCodeX), I don’t like VS’s tools.

However, transferring is now complete and there is no way back.

Inventing a bicycle or implementing a friendly head rotation system for game characters

It has been a long time since any serious programming challenge. And here it is! Just started some research on bone rotation in characters’ meshes and found out that the built-in system is.. Well… Not so friendly and not so easy to use. So here’s another challenge: make a friendly, easy to use bone rotation system within LBTechnology. Of course, I’ve been doing stuff like this before, and I know ‘the shit’, but well I’ve never programmed bone rotation system ‘from scratch’. And I just didn’t know it would be that challenging. Also I’ve been aware of the trickiness of such systems from them games, which do implement such systems – i.e. famous Mass-Effect and Fallout spinning heads. But you know, you don’t know something until you try it yourself. But I’m not them Bioware nor Bethesda – I’ve got plenty of time and plenty of dope to study the problem thoroughly and no project-master whipping my ass each time I do wrong.

So, what do we basically need to implement the head-facing-target system? Well: the character having its mesh with a needed bone, the target and some code. So we’ve got the char, the target, the only thing we need – is the code, which rotates the head to face the target.

tech_task
A technical task for this problem

Well, the first and the most obvious and, perhaps, the only solution is to take the distance between the target and the head formula_v_calc, get its normal, formula_v_modulo, somehow turn it into rotation formula_rotation and set this value to the head. Looks quite easy to implement with modern game development tools.

solution
A basic solution for this problem

Ha-ha, not that easy! Far not that easy! A plenty of problems await here, of course depending on the tool you’re using.

Problem number one, coordinatie transforms. This is the first thing you’ll encounter. For example, you’ve just calculated the formula_R_value value and you’re looking at the result… And the result seems to frustrate you! Really, the bone can twist any direction except the correct! Why does it happen? Simply because you’re setting the values in world coordinates. The bone may have its own coordinate basis or it may be using it’s parent bone’s coordinates or anything else like this. So, the first thing, you should take into account is coordinate transforms from world to local for the rotating bone. My solution of this problem is to go ‘the hard way’ – this means not to use any advanced math, just transform the axis based on a pre-set rule. I called this procedure Rotation Resolving (not yet copyrighted, I hope) based on some specialized structures – Rotation Resolvers. You just point each axis, from where to get its value – i.e [Yaw-Pitch, Pitch-Roll, Roll-Yaw]. This functionality was implemented in LBSkeletalMeshControlMechanism.

Code solving problem one
...

enum RotatorAxis
{
    RotatorAxis_Yaw,
    RotatorAxis_Pitch,
    RotatorAxis_Roll,
};

struct RotatorResolver
{
    var() RotatorAxis GetYawFrom;
    var() bool bInvertYaw;
    var() RotatorAxis GetPitchFrom;
    var() bool bInvertPitch;
    var() RotatorAxis GetRollFrom;
    var() bool bInvertRoll;
};

...

function rotator ResolveRotator(rotator r, RotatorResolver resolver)
{
    local rotator res;
    
    res.Yaw=ResolveRotatorAxis(r,resolver.GetYawFrom,resolver.bInvertYaw);
    res.Pitch=ResolveRotatorAxis(r,resolver.GetPitchFrom,resolver.bInvertPitch);
    res.Roll=ResolveRotatorAxis(r,resolver.GetRollFrom,resolver.bInvertRoll);
        
    return res;
}

...

function int ResolveRotatorAxis(rotator r, RotatorAxis axis, optional bool binvert = false)
{
    if (axis==RotatorAxis_Yaw)   
    {
        if (!binvert) 
            return r.Yaw;
        else
            return -r.Yaw;
    }
    else if (axis==RotatorAxis_Pitch)
    {
        if (!binvert) 
            return r.Pitch;
        else
            return -r.Pitch;
    }
    else if (axis==RotatorAxis_Roll)
    {
        if (!binvert) 
            return r.Roll;
        else
            return -r.Roll;
    }
}

...

Problem number two, rotation restraints. This is the second thing you’ll encounter. Afer all that coordinate transform troubles you’ll finally be able to set corresponding rotation values to the rotating bone. But your character’s head would spin around its neck like it’s not attached to it. And this result will frustrate you too! Because it does look strange and funny. Well, only birds can spin their heads more than 180°, but even they’re not able to make a 360° twist (but it seems like they can, anyway I don’t care).

voa1pp
A GIF from the internet

Therefore, you’ll need to limit the available angle of rotation for each rotation axis. The most obvious solution here is to clamp your desired angle, formula_a between this axis restraints formula_a1 and formula_a2 , so you’ll get your angle like formula_clamp_2.

angle_clamps

But this solution has on big drawback – sometimes you get wrong results. For example, if your angle uses formula_deg_forma_1 format, you’ll get some trouble trying to limit the rotation from 330° to 30°. The best solution in my opinion is to use the formula_deg_forma_2 format, especially if it runs up to infinity (both infinities), otherwise you’ll get troubles with cycle transition from 180° to -180° (just like me). But my solution of this problem is to go ‘the hard way’, it’s nothing that special except the ClampRotatorAxis function, which is… Well, just lol. Anyway, I’ve implemented a function, which clamps one axis, and a function, which clamps all three rotation axes. This functionality was implemented in LBBoneRotationMechanism.

Code solving problem two
...

function int ClampRotatorAxis(int axisvalue, int min, int max)
{
    local int r,f1,f2;
    
    f1=NormalizeRotAxis(min);
    f2=NormalizeRotAxis(max);
    
    r=NormalizeRotAxis(axisvalue);
    
    if (0<=f1*unrrottodeg && f1*unrrottodeg<=180)
    {
        if (0<=f2*unrrottodeg && f2*unrrottodeg<=180)
        {
            if (0< r+(-f2))    
                    r=f1; 
                else 
                    r=f2;    
            }
        }   
    }   
    
    return r;  
}

...

function rotator ClampRotator(rotator r, optional bool bClampYaw=false, optional int Yawf1=0, optional int Yawf2=0, optional bool bClampPitch=false, optional int Pitchf1=0, optional int Pitchf2=0,
optional bool bClampRoll=false, optional int Rollf1=0, optional int Rollf2=0)
{   
    local rotator res;
    
    if (bClampYaw)
        res.Yaw=ClampRotatorAxis(r.Yaw,Yawf1,Yawf2);
        
    if (bClampPitch)
        res.Pitch=ClampRotatorAxis(r.Pitch,Pitchf1,Pitchf2); 
     
    if (bClampRoll)
        res.Roll=ClampRotatorAxis(r.Roll,Rollf1,Rollf2);  

    return res;    
}

...

Problem number three, smooth movement. This is the third thing you’ll encounter, possibly. Setting the values even if they are axis-transformed and clamped causes your character’s head to rotate as fast as it is possible. For example, if the target teleports – your char’s head will instantly (in one frame) turn there. It looks very strange, sometimes even scares the crap outta player. Sometimes this problem is not actual, but for my case it is important to solve it (just because there are some objects that can teleport). So, what is the solution? It’s quite simple: we don’t set the exact rotation on each frame, we remember this value in one of our variables (a TargetRotation variable) and increase our head’s rotation each frame until we reach this value (using some kind of interpolation if you’re a math dude). Nothing special, but there is still a lot of problems here as we deal with cyclic values – the formula_deg_forma_2 form of degree value. My solution is just as described – increasing the real rotation with certain speed until it reaches the needed value. Well, I just used the linear interpolation formula to get the value for each tick, it works fine for some reason (except that case with cycle transition from 180° to -180°), but I’ll be making a new interpolation function anyway soon. This functionality was  also implemented in LBBoneRotationMechanism.

Code solving problem three
...

function float RotateYaw(float dt)
{
    local float crot,trot,rrot;
    
    trot=NormalizeRotAxis(GetTargetRotation().Yaw);

    crot=NormalizeRotAxis(currot.Yaw);   
    
    if (bSmoothRotation)
        rrot=LinearInerpFloatValue(crot*unrrottodeg,trot*unrrottodeg,TickIndependentFloat(AngularSpeed,dt,RotationTimeScale),dt)*degtounrrot;
    else
        rrot=trot;
        
    return rrot;   
}

...

function float LinearInerpFloatValue(float current, float target, float step, float dt)
{
    local float value;
    
    if (abs(current - target) > abs(step))
    {
        if (current < target)
            value=current+abs(step); 
        else
            value=current-abs(step);   
    }
    else
    {
        if (current < target)
            value=current+abs(current - target); 
        else
            value=current-abs(current - target);      
    }
        
     return value;
}

...

And, finally, there’s the result after long time spent debugging. Well, it was rough, even for me. Also I’ve included several additional features – a hard-align (always try to look at the target) and soft-align (look at the target only when the angle is inside them restraints), a Look-At-Point and Look-At-Actor modes, which can become quite handy for mechanism interactions.

Also, there’s a video with a complete demonstration of this system: